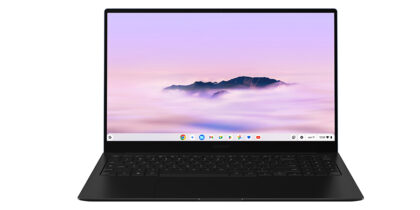
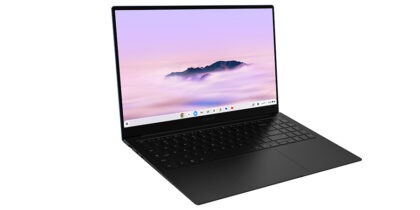
The rise of remote work over the past 12 months means IT administrators — more than ever before — need effective, easy-to-use tools for managing employee computing devices across their user base.
Chromebooks, combined with the Google Chrome Management Console, offer a path forward that’s ideal for businesses who are embracing the cloud. Available on Chromebook Enterprise devices like Samsung’s Galaxy Chromebook 2, the console delivers a single point of control for coordinating and implementing a wide range of device management configurations. From enforcing managed browsing policies and pushing or removing web applications to providing access to internal virtual private networks (VPNs) and Wi-Fi networks, the console gives administrators transparency and control across all devices.
The console makes it simple to enroll devices and take advantage of the features of the Chrome Enterprise Upgrade. It’s quick to get set up and easy to maintain your fleet of Chromebooks. And thanks to a recent redesign, the admin console is running up to 10 times faster than previous versions. Admins can centrally configure networks, preinstall and configure apps, control user access, and maintain a list of Chrome devices and their status.
Enrolling your devices
To start using the Chrome management console, you’ll first need to enroll all your devices. Devices must be enrolled before anyone signs in; if the devices have been used previously, they’ll need to be reset.
Which monitor is best for your workstation?
Get personalized recommendations on the optimal monitor setup for your space. Download Now
The Chrome admin console supports zero-touch enrollment, where your reseller uses a token to preprovision devices to your organization. This means devices will automatically be enrolled as soon they are powered on and connect to the internet. You can also mass enroll devices using a Rubber Ducky USB or other third-party solutions.
Managing enrolled devices
From the Devices tab, the Chrome enterprise console empowers administrators to centrally organize and manage a fleet of Chromebooks and set device and user policies by organizational unit.
Click Devices to see the device list, search for devices and view information such as the serial number and enrollment status. From there you can drill down for further detail, such as the device’s installed OS version, MAC address and last signed-in user.
From the Admin console home page, go to Devices and click Chrome management. Click Device settings and you’re ready to apply settings either to all users and enrolled browsers or by organizational unit, as business needs dictate:
- To access the device list from the Admin console home page, go to Devices > Chrome.
- To show all devices, check the Include all organizational units box.
- Click Serial number to see general information about the device.
- Click Status to see whether or not the device is in use.
- A green circle means the device is online and working correctly.
- Management mode specifies whether the device is managed by the cloud or Microsoft Active Directory.
Defining organizational units
Once the administrator has users under console management, the next step is to deploy device and user policies by organizational unit from within the console. Here, the admin can define an organizational structure, customizing access to services or settings for different users or devices.
From the Admin console home page, go to Directory > Organizational units. Here, you can create a new organizational unit, add a description of the organization or place the organization under a different parent organization.
There are more than 200 policies and settings that can be applied to managed devices. The admin can set Wi-Fi and proxy settings, preinstall apps and extensions, limit access to authorized users and more.
From the Admin console home page, go to Devices > Chrome. On the left, click Settings > Users & browsers. Here, you can define controls in a range of sub-areas including apps and extensions, security, remote access, network and content. Each area displays further submenus through which controls can be defined and then applied to specific groups of users — for example, full-time employees versus temps.
Managing network profiles
From the Admin console home page, go to Devices > Chrome. Under this section, you’ll find controls for not only device management, but also tools to set up and manage networked devices.
On the Devices tab, click Networks to add, remove or configure networks. While Wi-Fi networks can be added to a Chrome device at any time, Google recommends using the Admin console to push Wi-Fi profiles: They’ll be downloaded and applied to the Chromebook during enrollment.
Push these configurations out to the workforce using a preshared key (PSK) that is sufficiently complex, and never needs to be shared with end users.
Fine-tuning
The console makes it possible to fine-tune policies according to different use cases:
- Device Policies can be used to enforce settings and policies regardless of who is using the device, even if they sign in as a guest or with a personal Gmail account. These are set via the Device settings page, and these settings will apply to the device regardless of who is using it.
- User Policies can be applied to individual users regardless of which Chrome device they’re using and are set through the Users & browsers settings page. These settings enable users to sync their work apps, home tabs and themes when they sign in to their Chromebooks. The profile may include a maximum user session length, a custom avatar or custom wallpaper. You can also set policies around sign-in settings and specific apps and extensions.
- Managed Guest Session Policies can be used to configure settings for shared devices and include enforcement capabilities such as logging the user out after a specific amount of time. Managed guest sessions enable multiple users to share the same Chrome OS device.
- Kiosk Policies can be used to run a single Chrome app full screen without allowing the user to switch to another application. Common use cases include standardized digital signage displays, testing applications for schools and single-purpose devices used in retail kiosks.
- To blocklist and allowlist URLs, click Settings > Users & browsers, scroll to URL Blocking and enter URLs as needed. Blocklist URLs you want to prevent users from accessing, and use URL blocklist exceptions for those you want to allow users to access. You can also block apps or limit usage to apps downloaded from the Google Play Store.
- To pin apps for all users, go to the Apps and extensions management page. Here you can set policies for a specific app, or force-install an app and pin it to the Chrome taskbar.
While many organizations will simply implement the recommended default settings, there is plenty of room for admins to customize their device management. Some may opt to allow users to sign in only to specific Google Workspace domains. Others may choose to allow or block users from signing in or out of Google accounts within the browser.
With this array of controls, an admin can use the management console to oversee an enterprise-wide Chromebook deployment simply and easily. These management tools make Chromebooks an ideal choice for organizations looking to leverage the power of a cloud-native, application-based platform in support of maximum productivity and optimal security.
Ready to move to Chrome? Take a look at Samsung’s new Galaxy Chromebook 2, with a powerful processor and the world’s first QLED Chromebook display. Get started on your new device with this video featuring five essential tips for mastering the ChromeOS.


