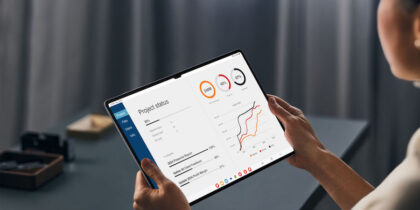
From retail and manufacturing to healthcare and field services, businesses are increasingly looking to replace bulky legacy barcode scanners with multipurpose smartphones and tablets. But while mobile devices offer so much potential for increased productivity, smartphones and tablets don’t deliver enterprise-grade scanning capabilities right out of the box. Businesses have to either accept a substandard user experience or undertake a significant coding project to natively integrate scanning capabilities into their apps and workflows.
Samsung’s Knox Capture solution eliminates that dilemma. Powered by the Scandit data capture engine, Knox Capture allows businesses to deploy enterprise-grade barcode scanning to their rugged Galaxy mobile devices. The camera becomes a powerful scanner with the performance and flexibility that frontline workers depend on.
If you’re ready to take advantage of Knox Capture, here’s how simple it is to get started:
1. Install and launch
Unlike third-party scanning tools that require IT to integrate application programming interfaces (APIs) and software development kits (SDKs), Knox Capture is off-the-shelf software that’s ready to use on day one. It’s also customized for rugged Samsung devices, like the Galaxy XCover Pro and the Tab Active3, using the high-resolution cameras for fast and accurate scanning.
Mobile device management for beginners
Get started with MDM so your organization can spend less and do more — securely and efficiently. Download Now
To get started, you’ll configure Knox Capture on one device. You can tailor the settings to your business by establishing a profile, which you can later share with your entire fleet of devices. Your profile in Knox Capture sets scan engine rules that determine:
- Which barcode symbols will be recognized
- How scanned data will be formatted for output
- How data will be supplied to your apps and activities
As you set up the first device, a series of tutorials will guide you through the Knox Capture app. For ease of use, Knox Capture includes a default profile with catch-all settings that allow you to begin scanning and testing right away.
To set up a custom profile, first download and install Samsung Knox Capture from the Google Play Store. (Knox Capture will only be visible on supported devices.) You can also push Knox Capture from your mobile device management (MDM) tool. The first time you launch Knox Capture, you’ll see Samsung terms and conditions. Upon your consent, you’ll also need to agree to partner terms and conditions.
Next, you’ll see the home screen with a list of Knox Capture profile configurations, including the default scanning profile. Below the profile list, you’ll see a deck of tips for different tasks, including creating a profile.
2. Configure scanning profiles
Here are step-by-step instructions for setting up scanning profiles and configuring Knox Capture:
- To create a new profile from scratch, click “Create profile.” You can also duplicate an existing profile.
- Name the profile, and then tap “Done.”
- Now, select the device apps and Android activities to associate with your new profile. For a particular application’s screen to be filled with barcode data, scroll down and tap the name of the app. For this example, we’ll select Samsung Internet.
- Tap the wand button in the upper right corner of the screen to launch the Visual Selection tool to select the barcode data fill-in step for your target app.
- If this is the first time you’ve opened the tool, you’ll see a pop-up with instructions. Tap anywhere on the screen to advance through the pop-ups. Select the activity you want to perform with the app. Tap “Done,” and then confirm to exit.
- Repeat this process for each app and activity you want to include in the profile. When you’re done, tap “Create profile” at the bottom of the screen.
- Now it’s time to configure Knox Capture. In the main profile settings, tap “Scan engine settings.”
- Verify the selected barcode symbologies by tapping “Barcode types.” Then scroll to review the selected types. Modify them as needed. When you’re done, tap “Save.”
- Tap the back arrow in the upper left corner of the screen to go back to the main Profile Settings.
Once you’ve selected the apps and activities that will receive Knox Capture data, choose which barcode types you want to scan. The most common ones — including Code 128, Code 39, DataMatrix, EAN13, EAN8, Interleaved 2 of 5, QR, UPCA and UPCE — will be associated with each of your profiles by default. You can also select many other barcode symbologies.
As you continue to configure Knox Capture, consider the kind of employee experience you want to enable. Do you want users to hear a beeping sound every time they’ve scanned a barcode successfully? If not, you can disable that at this stage. Also consider the camera: You can, for example, specify that the user can easily toggle the flashlight from the camera screen if they’re scanning in a dark area. Knox Capture comes with many different customizable preferences based on single scans, multiple scans and more.
Next, set the keystroke output rules. In this example, we’ll set rules to append an “Enter” keystroke to scan data as a required format.
- First, ensure that all entries get sent as key events. In the Profile Settings screen, under “Keystroke output,” select “Send entered character as.” In the options pop-up, select “Key event” and then save.
- Next, append an “Enter” key to the scanned data.
- Then, by “Basic data formatting,” tap the down arrow to expand the menu. Scroll down to “Append enter character,” and toggle it on. You can now set rules to append an Enter Key event to scan barcode data.
- Tap the back arrow in the upper left corner to return to the home screen and save your profile.
3. Test your configuration
As always, you should test your new technology predeployment to ensure the experience delivers on expectations and quickly brings return on investment (ROI) for your business.
Knox Capture streamlines the process with Test Mode, available via the home screen. When Test Mode is activated, you can open any app and see details such as the activity related to the app and the profile it’s associated with.
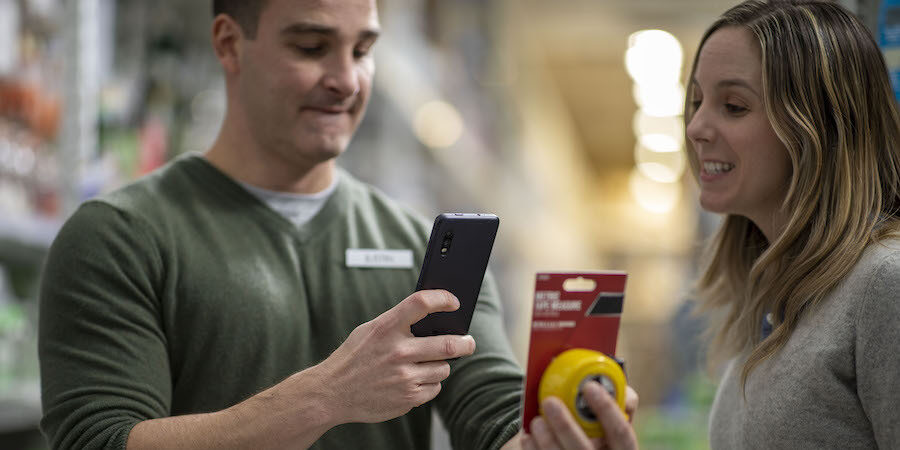
To perform a test scan in Knox Capture, you can program a softkey or a hardware key, with no additional cost or licensing. Just open the camera and watch the barcode come into focus automatically.
This is when you should check your test data, such as the scanned data and output: For example, have you set the correct keystroke output rules? And are they being applied? As you work through this process, Knox Capture helps you track your progress with a green checkmark next to each completed app.
Here are step-by-step instructions for testing your profile. In this example, we’ll test the configuration for Samsung Internet:
- Go back to the Knox Capture home screen and start Test Mode by tapping the “More actions” icon next to the Profiles label and selecting “Test apps.”
- You should see a system notification indicating that Test Mode is on. Next to “Samsung Internet,” tap “Open.” Note the blue Test overlay in the open apps screen. The overlay shows the name of the Android activity and focus, as well as the Knox Capture profile associated with the in-focus activity. This profile defines the scanning settings and keystroke outputs for the input activity.
- To open the camera for scanning, press the scan trigger hardware key. Aim the camera at the barcode. Once it’s in focus, the barcode will be scanned automatically, unless your scan settings specify differently.
- Expand the overlay by tapping its down arrow for a complete view of the test data. Compare the scan data to the output value to ensure that you set the correct keystroke output rules in the scanning settings.
- After testing the app, you should see a green checkmark next to the Samsung Internet logo on the Test App screen.
4. Share configuration and deploy
The steps we’ve covered above will guide you through setting up a Knox Capture configuration with profiles in Admin Mode. You then load the profile into your enterprise mobility management (EMM) tool, where you can mass-deploy it once you’ve gathered your license key. Distribute it across your fleet with Managed Google Play or as an email attachment.
Users will be able to set scanning triggers and view a configuration, for instance, but they won’t be able to modify a configuration, import or export it or create new configurations.
While some aspects of this process will depend on the EMM your organization uses, Knox Capture configurations can be exported as an email attachment and then mass-deployed once you’ve gathered your license key.
Here are step-by-step instructions for deploying a configuration:
- In the lower right corner of the home screen, tap the floating blue button to open the Share Options menu.
- In the Share Options menu, tap the email option. Select an email app to start a new message with the configuration added as a text file attachment.
- After sending the email, relaunch Knox Capture. You’ll see a notification near the top of the screen showing when you last shared your configuration.
- Open the email from your work device and upload the configuration to your EMM console to deploy it through Managed Google Play. You can now set a basic configuration to use Knox Capture on corporate devices.
5. The end-user experience
For end users, starting to use Knox Capture on a Galaxy mobile device is easy and intuitive. Individual users can download and install the Samsung Knox Capture app from the Google Play store, or you can preinstall the app through an MDM solution.
Here are step-by-step instructions to get started as an end user in Knox Capture:
- The first time you launch Knox Capture, you’ll be asked to view the privacy policy and end-user license agreements (EULA). After reviewing the terms, tap “Agree” to move to the home screen.
- The home screen features the camera scan triggers menu. An expandable menu to the right provides options to view the current configuration, access support and see the Knox Capture About page.
- To start scanning, you’ll simply open your app and tap on an input field, like a form-fill.
- Next, either tap the Capture icon on your keyboard or press the hardware key setup to trigger the camera scanner. By default, the trigger on the Galaxy XCover Pro is the XCover key located on the left side of device. On the Galaxy Tab Active3, the trigger is the Tab Active key located on the right side of the device.
- Knox Capture will then initiate scanning, using the device’s high-resolution camera. Once the barcode is captured, data will be processed according to the rules established in your profile.
Knox Capture then sends the data back to the app where you triggered scanning. If your current configuration includes keystroke output rules, you’ll see the result of those rules now. For example, your IT admin may have created a rule to append an Enter Key event. When the camera scans the data and sends it to the input field, the app registers an “Enter” key press.
By creating Knox Capture profiles and distributing them across your device fleet, you’ll be able to deliver enterprise-grade scanning capabilities from your rugged Galaxy mobile devices. Upfront integration is simpler than ever, and you don’t have to compromise on performance or employee experience.
Team productivity is tough to manage at the best of times, but it’s especially tricky while you’re working remotely. Discover more ways the Samsung Knox software suite can enhance your team’s mobile business productivity. Or, get expert tips on optimizing your full mobile fleet with our free beginner’s guide to MDM.