Get the most out of your Samsung Galaxy mobile device, such as Samsung Galaxy Z Fold5 and Samsung Galaxy Z Flip5, with these handy tips and tricks covering a wide range of useful tools designed to turn you into a Samsung master.
Adding and sharing contacts as a QR code
It’s easy to add and share contacts on your Samsung mobile device using QR codes. Follow these steps to create a QR code for your own contact details to share with others, or to scan in someone else’s contact details.
Sharing your details
- Open Contacts app. Launch the Contacts app on your device.
- Access your contact details. Navigate to your own contact details.
- Tap QR code icon. Locate and tap the QR code icon in the bottom left corner.
- Share your QR code. Your QR code is generated. Share this code with a recipient device. The recipient can scan and add your contact details immediately.
Adding a contact
- Open Contacts app. Open the Contacts app on your device.
- Access QR code feature. Look for the QR code icon at the top.
- Scan QR code. Hold your device steady and position it to scan another device’s QR code.
- Save new contact. After scanning the code, the new contact details appear. Save this to your address book.
By following these steps, you can share your contact details easily using a QR code and add new contacts to your device using others’ QR codes.
Finding a lost mobile device
Samsung Find My Mobile is a free service you access via your Samsung account that allows you to locate, back up remotely and wipe data from a registered Samsung Galaxy mobile device. Here’s how to use Find My Mobile to locate and manage a lost device.
- Set up Find My Mobile. Set up Find My Mobile through your Samsung account. This free service helps you locate, back up remotely and wipe data from your registered Samsung device.
- Send your device’s last location. If your device goes missing, use Find My Mobile to send its last known location to help track it down.
- Turn on Offline finding. Enable Offline finding to locate your device even when it’s not connected to the internet.
- Unlock your device remotely. Unlock your device remotely if you’ve misplaced it.
- Locate a lost device. Utilize Find My Mobile to track the current location of your lost device.
- View network connectivity and battery life remotely. Check the device’s network connectivity and battery life remotely.
- Ring at maximum volume. Make your device ring at its maximum volume to help you find it if it’s nearby.
- Lock your device, prevent power-off or display a contact number. Secure your device by locking it, preventing it from being powered off, or by displaying a contact number on the screen.
- Track your device’s location. Track your device’s location continuously using Find My Mobile.
- Erase or back up data. If you cannot access your device immediately, you can erase data remotely or back it up to protect your information.
- Extend battery life. Get tips on extending your device’s battery life using Find My Mobile.
- Unlock your device without a PIN or password. Unlock your device without using a PIN or password, if necessary.
- Get notified if your device connects to a network. Receive notifications if your lost device connects to a network.
Find My Mobile offers a variety of solutions to help locate and manage a lost Samsung mobile device. Whether it’s pinpointing a location, safeguarding data or ensuring security, the handy service offers a comprehensive tool kit to address the loss of your device.
Adding and using a card in Samsung Wallet
Samsung Wallet is a digital version of your real wallet. Follow these steps to add and access payment cards, membership cards, gift cards, digital keys, health passes, digital assets, boarding passes and more on your Samsung mobile device.
Adding a card
- Access Samsung Wallet app. Open the Samsung Wallet app, or download it from the Galaxy store.
- Accept permissions and log in. Accept any required permissions, and then log in using your Samsung account.
- Set up Verification method. Choose either your fingerprint or personal identification number (PIN).
- Initiate adding a card. In the Quick access tab, locate and tap “Add.”
- Select Payment cards. Next, tap on “Payment cards.”
- Use Camera for card details. Use your phone’s camera to capture your card details and add billing information.
- Card successfully added. Your card is now added to Samsung Wallet.
Making a payment
- Swipe up on home screen. From your home screen, swipe up.
- Select a card. Choose the card with which you want to pay.
- Fingerprint scan. Scan your fingerprint to verify your identity and authorize payment.
- Hover over card reader. Finally, at the pay terminal, hold your phone over the card reader.
By following these steps, you can add cards to your Samsung Wallet and use Samsung Pay to make in-store payments easily and conveniently.
Pinning apps on your quick launch for faster access
Pinning an app ensures it is readily accessible whenever needed, offering convenient, quick access. Here’s how to do it.
Pinning an app
- Access Recent apps. Begin by tapping the “Recent apps” button. This displays a list of all apps currently open on your device.
- Select app to pin. Choose the app you want to pin. Then, tap the icon located at the top of the preview window.
- Choose “Keep open.” From the options, select “Keep open for quick launching.” This action pins the selected app, ensuring it remains running in the background.
- App pinned and locked. Once pinned, the app cannot be closed. A lock icon indicates the app has been pinned successfully.
Unpinning an app
- Identify the pinned app. Locate the pinned app. Look for the lock icon.
- Unpin the app. To unpin the app, simply tap the lock icon. This reverts the app to its normal state.
Use these instructions to pin and unpin apps easily on your Samsung mobile device, customizing your experience and making your apps more accessible.
Printing documents from your device
Printing documents directly from your Samsung Galaxy mobile device is a breeze. These instructions walk you through the process of installing a print service and using it to print documents from the integrated Office Mobile app.
Installing a print service
- Access Office Mobile app. Open the Office Mobile app on your device.
- Access print options. Inside the Office Mobile app, locate and tap the Options icon at the screen’s top right corner. From the menu, select “Print.”
- Add a printer. To add a printer, tap the menu in the screen’s top left corner. If no printer is detected automatically, choose “Add printer.”
- Select print service. Choose a printer from the list. If a printer isn’t installed already, download and install the corresponding print service app.
- Connect your printer. After installing the print service app, add your printer. Connect directly using Wi-Fi or by entering the printer’s IP address.
- Choose your printer. Next, select the printer that you added. Your printer may require you to accept the connection request.
Printing your document
- Configure print options. Now that you’ve connected a printer, configure its print settings. Adjust the number of copies, choose a color setting, specify a desired page range and more.
- Start printing. After configuring your options, tap the yellow print icon to initiate the printing process.
Future printing
For future print jobs using the same printer, simply select your print options and tap “Print.”
Just follow the steps, and you can print documents from your Samsung mobile device using the Office Mobile app and an installed printer.
Scanning documents from your device
Samsung Mobile makes it quick and easy to scan and share documents. Follow these instructions to learn how to digitize and share single- and multipage documents with the camera and Office Mobile app.
Scanning single-page documents
- Open Camera app. Launch the Camera app on your Samsung Galaxy mobile device.
- Position document. Place the document in the center of your camera’s view.
- Automatic detection. The Camera app automatically detects the document. Next, tap the “Scan” button.
- Review scan. Tap the scan thumbnail to review the scan. Zoom in to review scan quality.
- Edit and save. Edit, crop or rotate your scan if you wish. When you’re satisfied, tap “Save.”
- Share. To share the document, tap the share icon and select method — via email or Messenger, for example.
Scanning multipage documents
- Open Office Mobile app. Access the Office Mobile app.
- Make a PDF. Tap “Actions” at the interface’s bottom right corner. Choose “Scan to PDF.”
- Scan first page. Scan the document’s first page. Then, tap “Add New.”
- Continue scanning. Repeat the process for each page. When you’re done, tap the red arrow.
- Review and edit. Review your pages. Crop or annotate them if you like. When finished, tap “Done.”
- Share the document. Now, share the scanned multipage document — via email or Messenger, for example.
Follow these steps to scan and share single- or multi-page documents effortlessly using your Samsung Galaxy mobile device and give your productivity a boost.
Adding and sharing contacts by scanning QR codes
It’s easy to add and share contacts on your Samsung Galaxy mobile device using QR codes. Follow these instructions to create a QR code for your own contact details and to scan someone else’s details.
Creating your own QR code
- Access Contacts app. Open the Contacts app on your device.
- Open your contact details. Next, locate and open your own contact details.
- Generate QR code. Tap the QR code icon in the screen’s bottom left corner.
- Instant contact addition. A recipient scans your QR code to add your contact details quickly to their device.
Scanning and adding contacts via QR code
- Open Contacts app. Open the Contacts app on your device.
- Access QR code feature. Next, tap the QR code icon at the top of the app.
- Scan the QR code. Hold your phone steady and position it to scan the QR code bearing the contact details you wish to add.
- Save the new contact. After scanning the code, the new contact’s details appear. Save this contact to your address book.
These steps help you create and share QR codes for your own contact details, and scan and save contact info from QR codes shared by others — a fast and easy way to connect with new contacts on your Samsung Galaxy mobile device.
Mirroring your Samsung mobile device to a Smart TV
With screen mirroring, it’s easy to share your mobile device’s screen on a Samsung Smart TV and cast your device’s content onto the TV for a better viewing experience. The Smart View feature is available on most Samsung Galaxy mobile devices. Here’s how to make it work:
Mirroring your screen
Requirements:
- A smart TV that supports screen mirroring
- A smart mobile device
Note: Other brands may name their screen mirror options differently. Look for terms like:
- Mirroring
- Miracast
- Wireless display
- Mirror share
- Screencast
- Screen share
- Multi-screen
Enable Smart View in three easy steps:
1. Enabling Smart View on your TV
- Go to Settings. Navigate to the “Settings” menu on your Samsung Smart TV.
- Select General. Choose “General.”
- External Device Manager. Tap on “External Device Manager.”
- Select Device List. Proceed to “Device Connection Manager,” then tap “Device List.”
- Available devices. A list of available devices appears on the screen.
- Select a device. From the list, select your mobile device’s name.
2. Enabling Smart View on your device
- Quick settings. Pull down the Quick Settings panel.
- Smart View. Locate and tap on the Smart View icon.
- Available devices. Your device scans and lists the available devices to which to connect.
- ID Smart TV. Identify and select “Samsung Smart TV.”
- Start casting. To start casting with Smart View, click on “Start now.”
3. Pairing your mobile device and TV
- Permission. A permission prompt appears in the screen’s top right corner.
- Allow. To connect, tap on “Allow.”
- Connect. Your mobile device screen is mirrored on the Samsung Smart TV.
Enjoy the experience of viewing your Samsung mobile device’s content on a larger screen using the Samsung Smart View feature. Follow these simple instructions, and you’ll be screencasting in no time.
Sharing your power with another device
Your Samsung mobile Galaxy device comes with Wireless PowerShare, which lets you charge other Qi-certified devices just like a wireless charger. Simply place the second device on top of your device. No cable is necessary.
- Check battery level. First, make sure your device has a 30% charge or more.
- Access Notifications. To enable PowerShare, swipe down the Notifications panel and tap the “Wireless PowerShare” button.
- Confirmation pop-up. A pop-up menu appears, informing you you’re ready to charge.
- Turn device over. Turn over your device, so the screen is face-down.
- Align devices. Place the center of your phone back-to-back with a second device.
- Qi-compatibility. Charge any Qi-compatible Samsung device or accessory. It also works with many non-Samsung Qi-compatible devices.
- Wired or wireless. Use Wireless PowerShare when your Samsung Galaxy mobile device is charging or use it completely wirelessly.
- Unpair the devices. Separate the devices when you’ve transferred enough power or the other device is charged fully.
- Automatic disable. Wireless PowerShare disables itself after 30 seconds if it detects no second, chargeable device.
Follow these steps to enable Wireless PowerShare. Then, charge up another device on the go and embrace your power to share.
The mobile security top 10
Get your free guide to better securing the personal and work data on your mobile phone. Download Now
Turning your device into a mobile hotspot
When you need Wi-Fi on your laptop or tablet and you’re on the go, you can transform your Samsung Galaxy mobile device into a hotspot easily. These steps show how to activate the mobile hotspot feature, set up a password and take advantage of other advanced options.
Activating mobile hotspot
- Access Quick Panel. Access Quick Settings by pulling down the Quick Panel.
- Activate Mobile Hotspot. Locate and long-press the “Mobile Hotspot” option. Then, toggle on the “Mobile Hotspot” switch.
Configuring hotspot settings
- Change password. If you want to modify your hotspot password, use Mobile Hotspot settings.
- Enable Auto Hotspot. To share connectivity with your other devices seamlessly, turn on “Auto Hotspot.”
- Set timeout. To save on battery life, set a timeout duration so your hotspot turns off automatically when you’re not using it.
Connecting devices to your hotspot
- Access Wi-Fi settings. On your device, pull down the Quick Panel settings. Open Wi-Fi.
- Activate Wi-Fi. If Wi-Fi isn’t enabled already, turn it on.
- Select your phone. Locate your phone’s name in the network list. Tap your phone to connect.
- Enter password. Input the hotspot password and tap “Connect.”
You’re now using your phone’s mobile data for internet access. But remember: multiple devices can connect to your hotspot. Be sure to monitor your data usage to avoid exceeding your mobile plan’s limit.
By following these steps, you can convert your Samsung Galaxy mobile device into a mobile hotspot easily and use it to connect other devices to the internet.
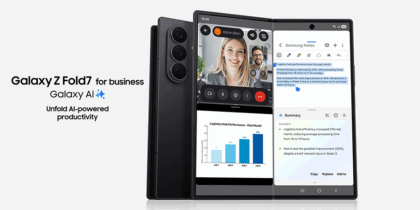
Unfold next-level productivity for your business with Galaxy Z Fold5 today. And see how much your company could save by replacing legacy tech with foldables using this simple cost calculator.


